HyperLap2D efficiently manages project assets by packing them into texture atlases. This reduces the number of draw calls and optimizes performance for your game.
Texture Atlases
By default, all images and animations are stored in the Main Pack. However, you can organize assets into multiple specific atlases to manage memory and loading times more effectively.
Organizing Assets
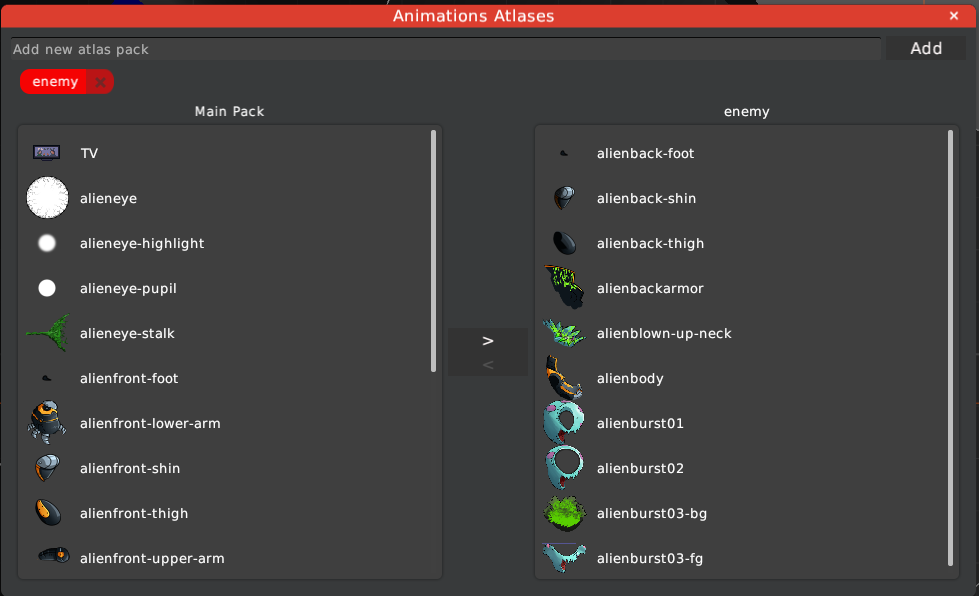
The atlas management interface is split into two sections: one for Images and one for Animations.
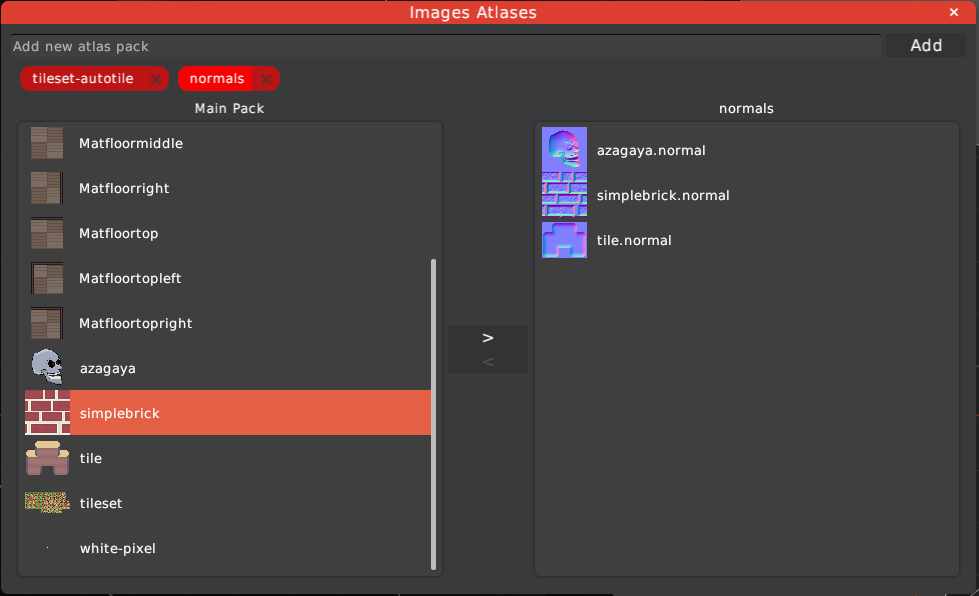
- Adding Atlases: You can create new atlas packs using the input field at the top. Each atlas is represented by a “chip” that can be selected.
- Moving Items: Select an atlas chip and use the arrow buttons to move assets from the Main Pack (left) to your specific atlas (right).
- Merging Packs: If you create a texture atlas and an animation atlas with the same name, HyperLap2D will pack both types of assets into the same physical PNG file.
Every time you modify atlas assignments, navigate to
Resources -> Repack Assetsto regenerate the internal texture atlases.
Folder Organization
Assigning textures to specific atlases also helps organize your Resources Panel. When an image is moved out of the Main Pack into a custom atlas, it appears inside a folder within the editor UI.
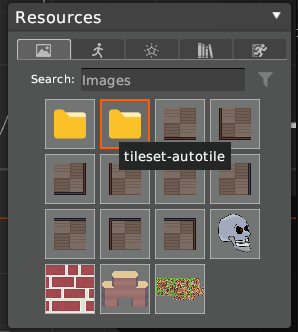
- Navigation: Double-click a folder to enter it and access the specific assets assigned to that atlas.
- Workflow: This allows you to keep the main resource view clean and grouped by category (e.g., “UI”, “Backgrounds”, “Characters”).
Generators & Import Tools
HyperLap2D includes built-in tools to generate assets or split existing ones directly within the editor.
Placeholder and Noise
You can generate basic assets without leaving the editor:
- Create Placeholder: Generates a solid color PNG with custom dimensions.
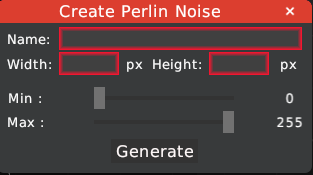
- Create Perlin Noise: Generates a noise texture, useful for shaders or procedural effects.
| Placeholder Generator | Noise Generator |
|---|---|
 |
 |
Sprite Sheet Cutter
If you have a sprite sheet organized in a uniform grid, you can use the Sprite Sheet Cutter to import it.
![]()
- Select your sprite sheet file.
- Define the Sprite Width and Sprite Height in pixels.
- Click Import.
The tool automatically splits the large PNG into individual resources. This is necessary because HyperLap2D will eventually repack these individual frames into its own optimized atlases alongside other project assets.