Lights are one of the most important effects in a game. They provide a unique atmosphere and enhance the visual quality of your project. HyperLap2D supports both dynamic lights and shadows, including full support for normal maps.
Basic Lights Setup
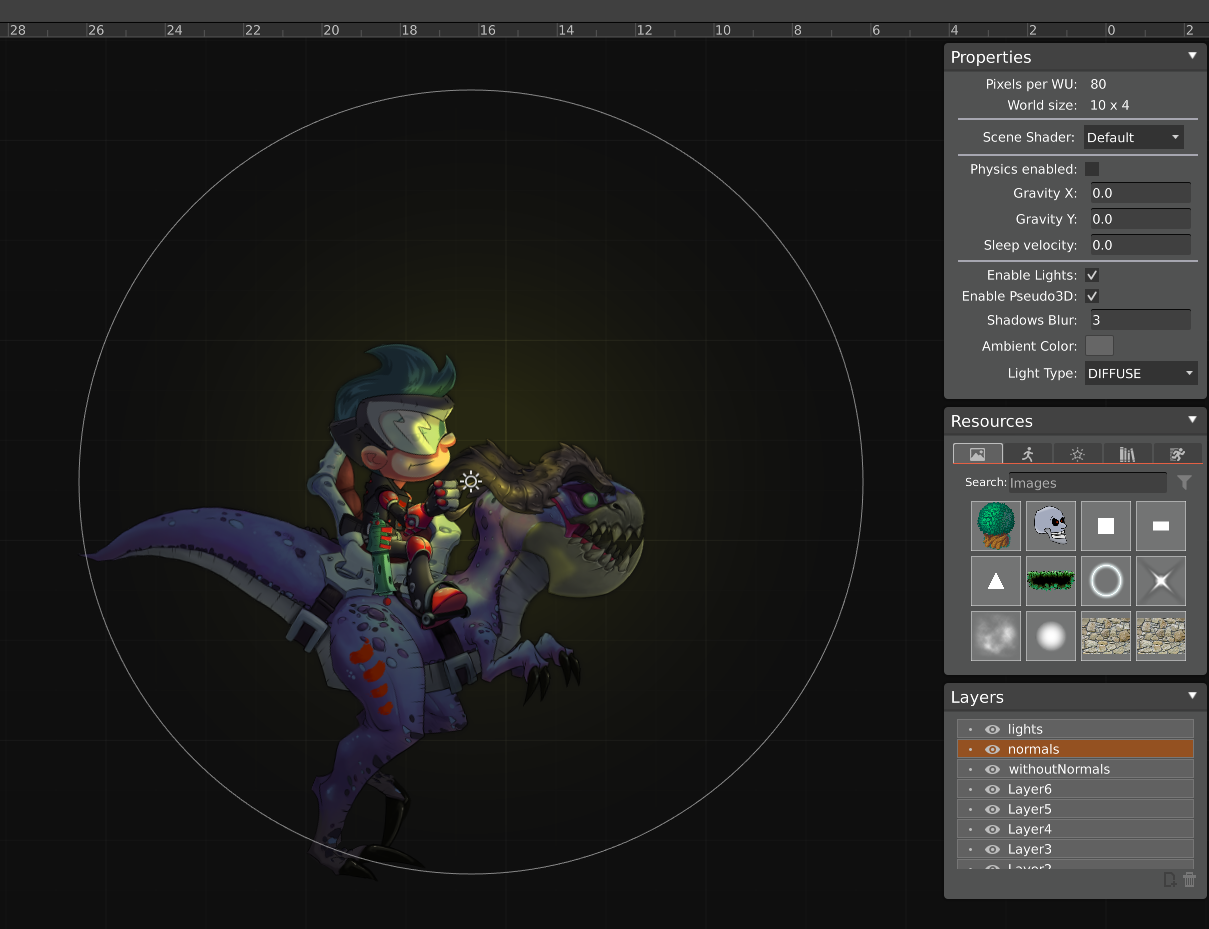
First, the lighting engine must be enabled in the Scene Properties panel by checking the Enable Lights option.
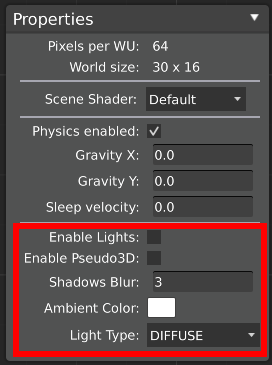
There are three types of Ambient Light, which control the global scene illumination:
Diffuse: A blending option that makes lights more realistic but results in a darker environment.Directional: Simulates a light source at an infinite distance (e.g., the sun). Direction and intensity remain constant throughout the scene. A-90direction points straight down.Bright: Pure lights without complex blending.
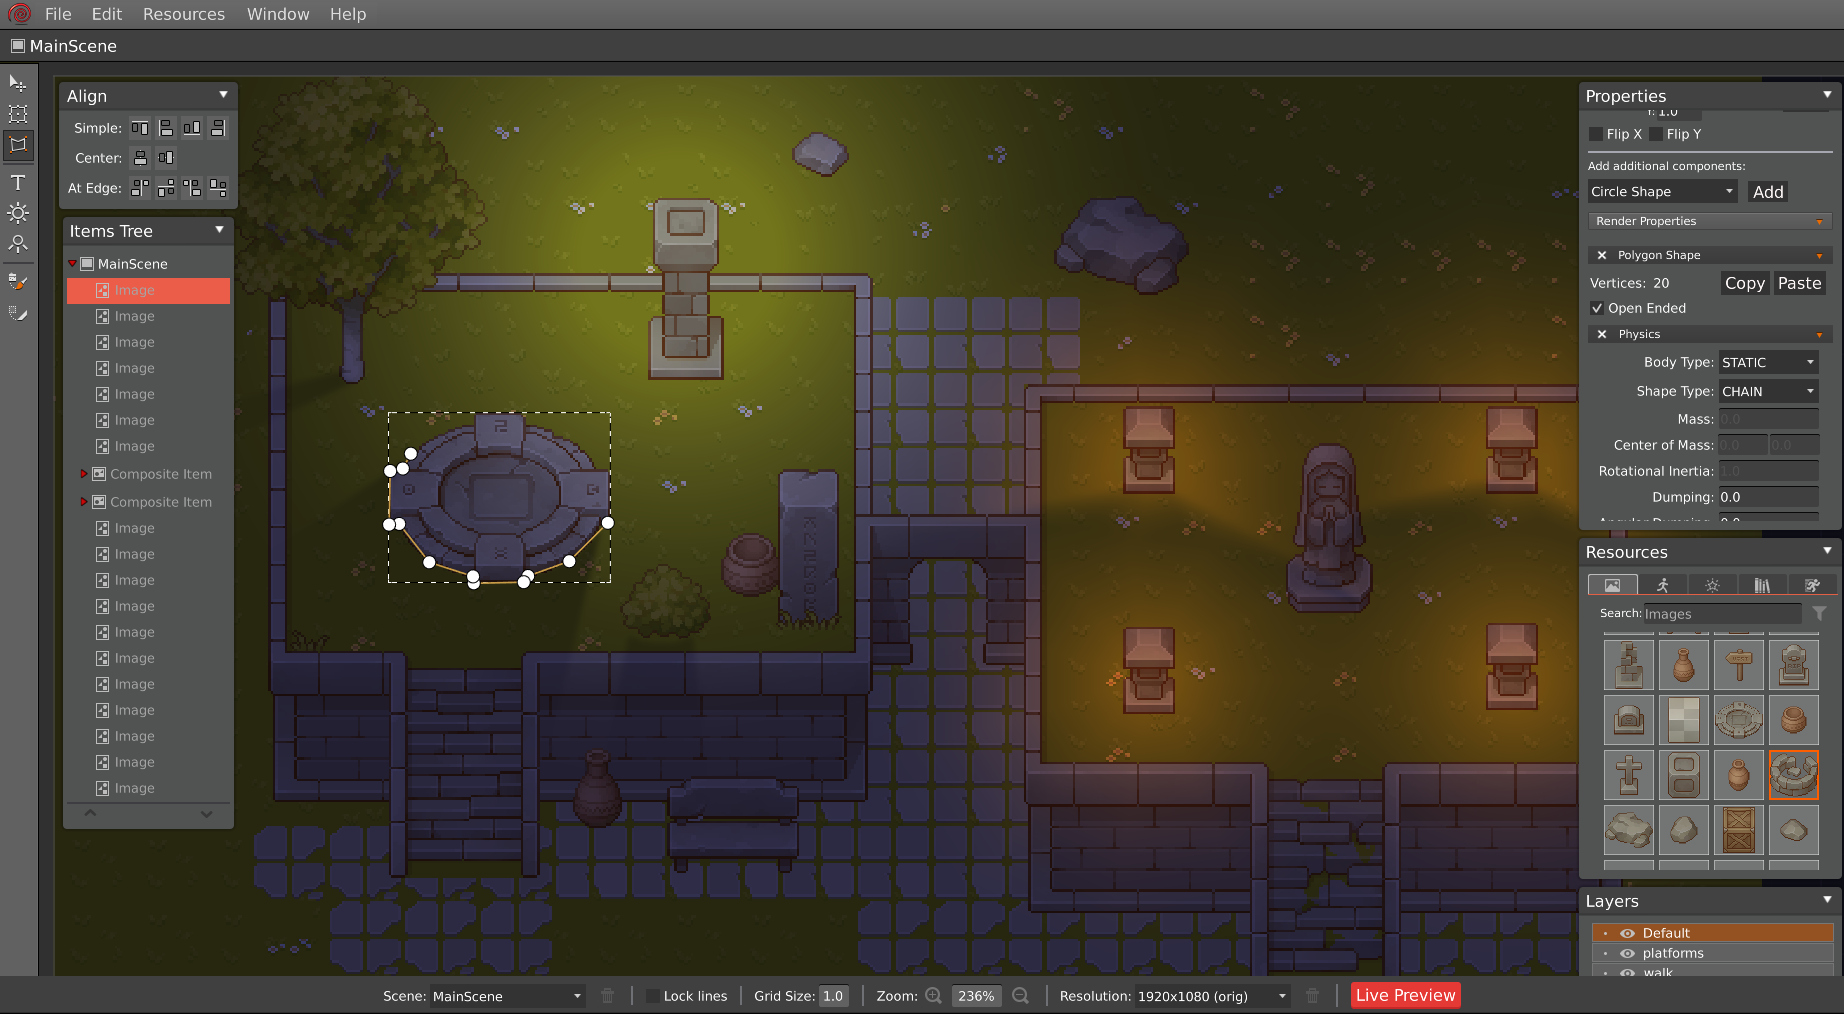
Dynamic Shadows
HyperLap2D casts dynamic shadows for entities that possess both a Shape component (Circle or Polygon) and a Physics component.
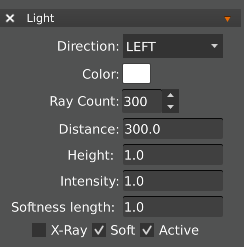
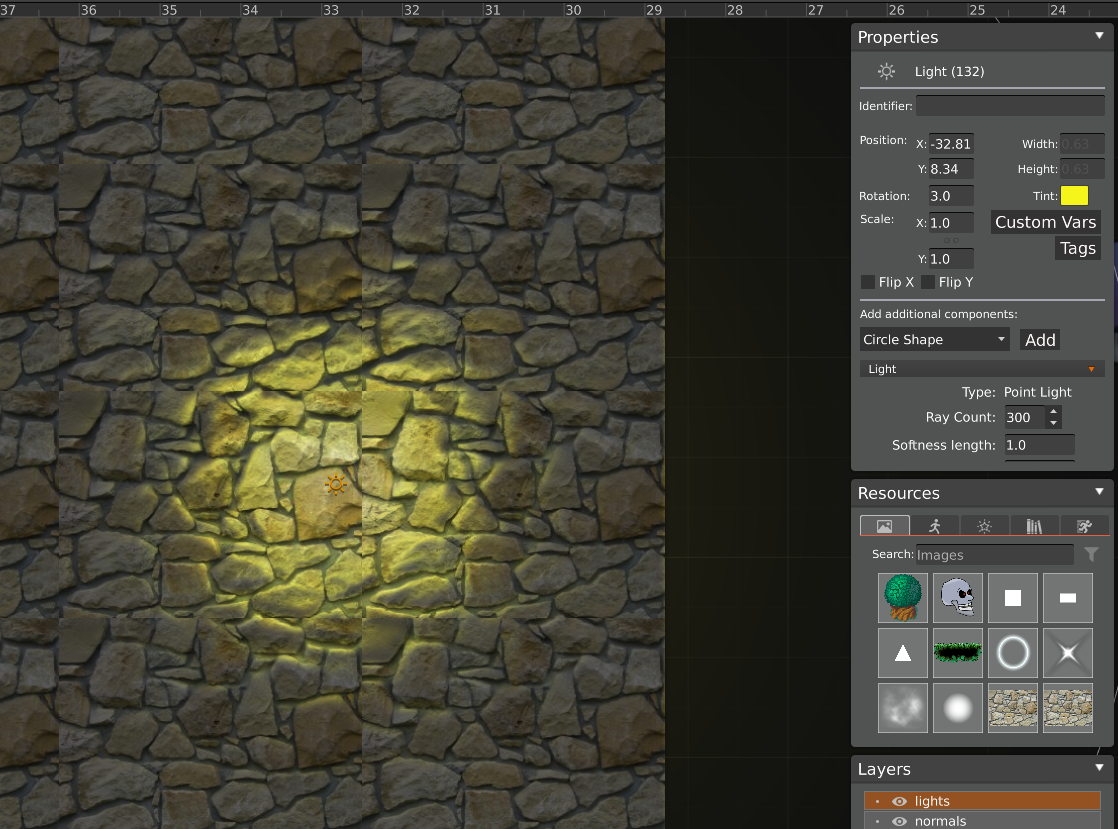
Lights are objects created with the Point Light or Cone Light tools. All settings can be managed via the Properties panel:
Type: The type of the currently selected light.Ray count: The number of light rays (higher counts increase realism but affect performance).Softness Length: The softness value for the tips of the beams.Height: The elevation of the light in space, used for Pseudo3D shadows and Normal Map rendering.Static: Sets the light as static for optimization.X-Ray: Allows light to pass through Box2D bodies.Soft: Enables soft shadows.Active: Enables or disables the light source.Radius: (Point lights only) The radius of the light circle.Distance: (Cone lights only) The maximum distance of the light beam.Angle: (Cone lights only) The angle size (in degrees) of the light cone.Direction: (Cone lights only) The direction (in degrees) of the light cone.
Lights can have different colors, which can be adjusted via the Tint property.
Body Lights
Entities can emit light to create chain or neon effects. To do this, add a Light component to an object that has both Physics and a Shape component.
Pseudo3D Shadows
Pseudo3D allows objects to cast shadows with depth and perspective, simulating a 3D environment. To use this feature, check the Enable Pseudo3D option in the Scene Properties panel.
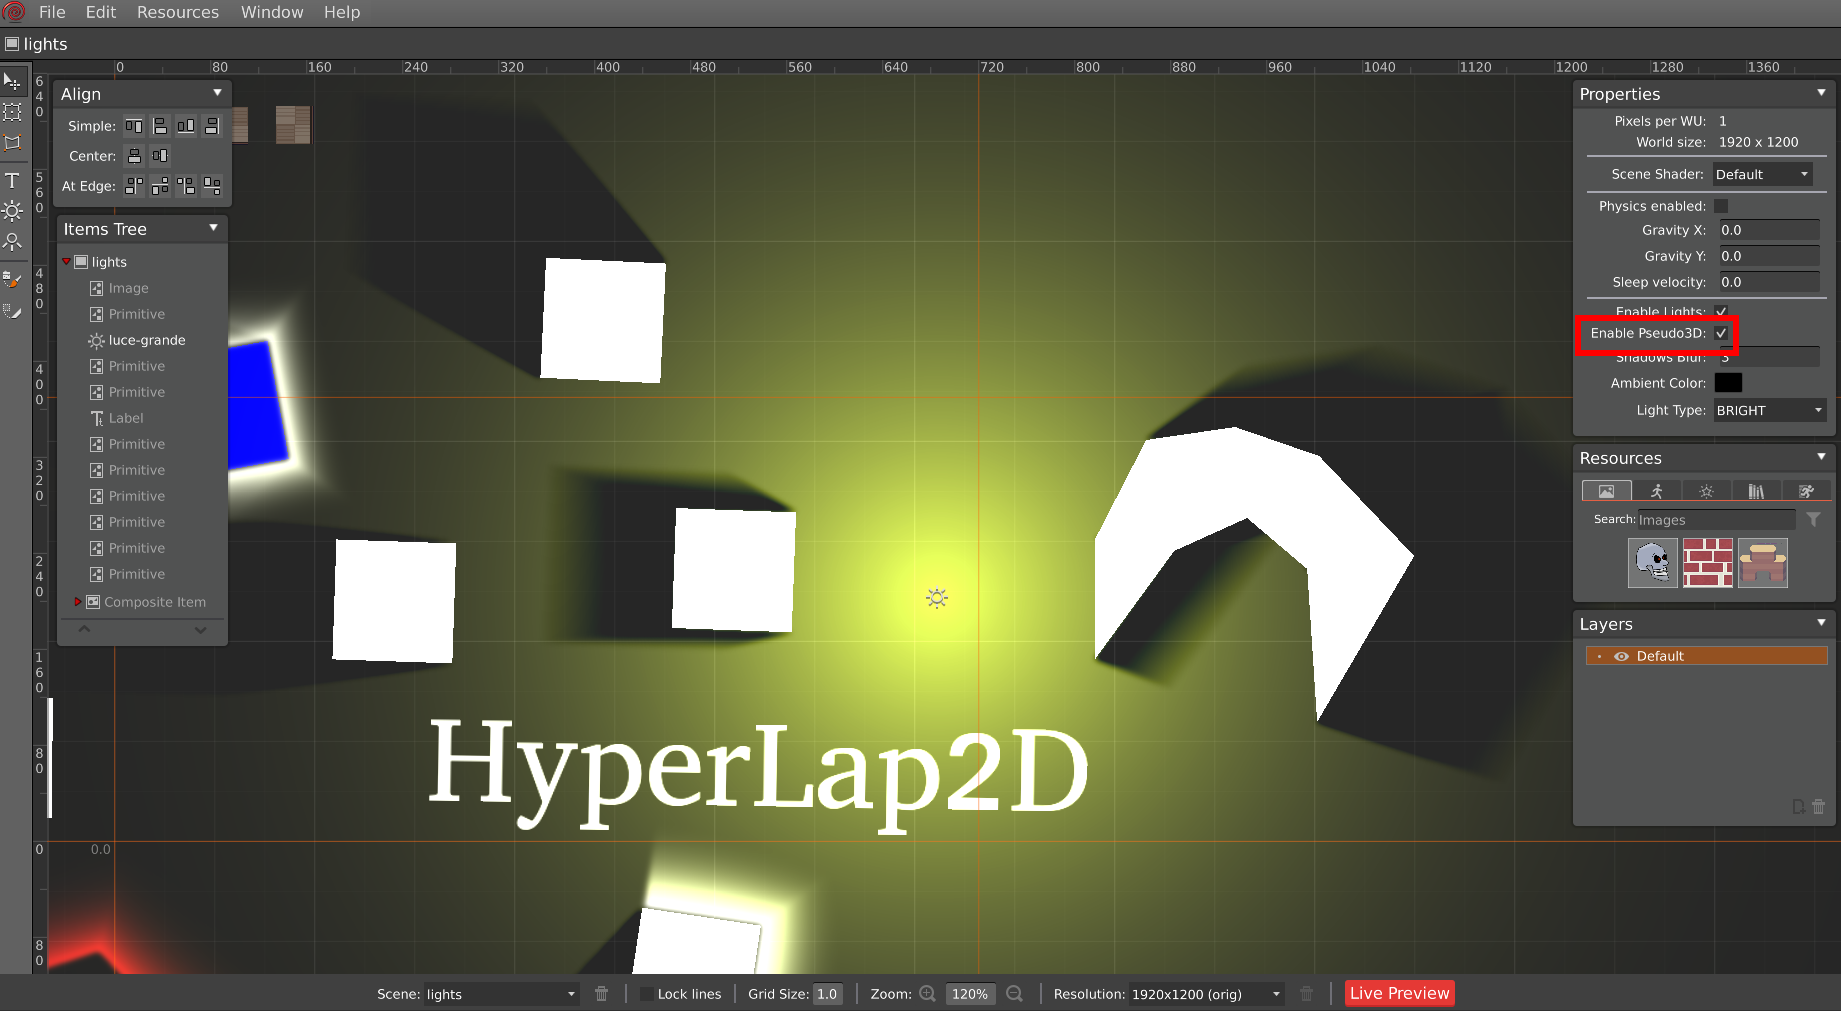
The length and orientation of the shadows are determined by the Height property of the light source and its distance from the objects.
Normal Maps
Normal mapping is a technique used to make 2D assets appear 3D when illuminated. HyperLap2D supports normal mapping natively.
Simple Images
To use normal maps for standard images, follow the naming convention: for any <image>.png, include a normal map variant named <image>.normal.png. The rendering pipeline will automatically recognize it.
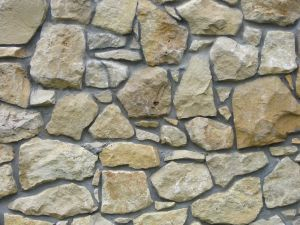
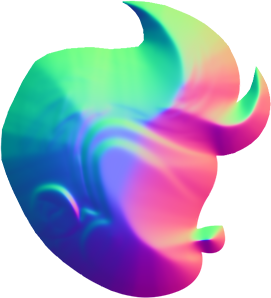
The effect is achieved using the following textures:
| Texture | Normal Map |
|---|---|
 |
 |
| wall.png | wall.normal.png |
Spine Animations
Normal mapping is also supported for Spine animations.
- Create an empty skin named
normalMapin the Spine 2D Editor. - Once imported, each attachment must have its respective normal map texture.
When importing a Spine animation, HyperLap2D unpacks the atlas into multiple files in
<project-folder>/assets/orig/images. The naming convention for these PNGs is<animationName><attachmentName>.png. Therefore, normal maps must follow the schema:<animationName><attachmentName>.normal.png.
Example using the raptor animation and head attachment:
| Texture | Normal Map |
|---|---|
 |
 |
| raptorhead.png | raptorhead.normal.png |
Normal map textures are imported as simple PNG files. HyperLap2D will automatically locate them and apply the effect.
Spine 2D is a commercial product by Esoteric Software. The examples provided are for demonstration purposes.
Generate Normal Maps with Laigter
While many tools exist to generate normal maps, Laigter is an excellent open-source choice. It allows for batch exporting textures with the correct suffix to match HyperLap2D’s naming convention.
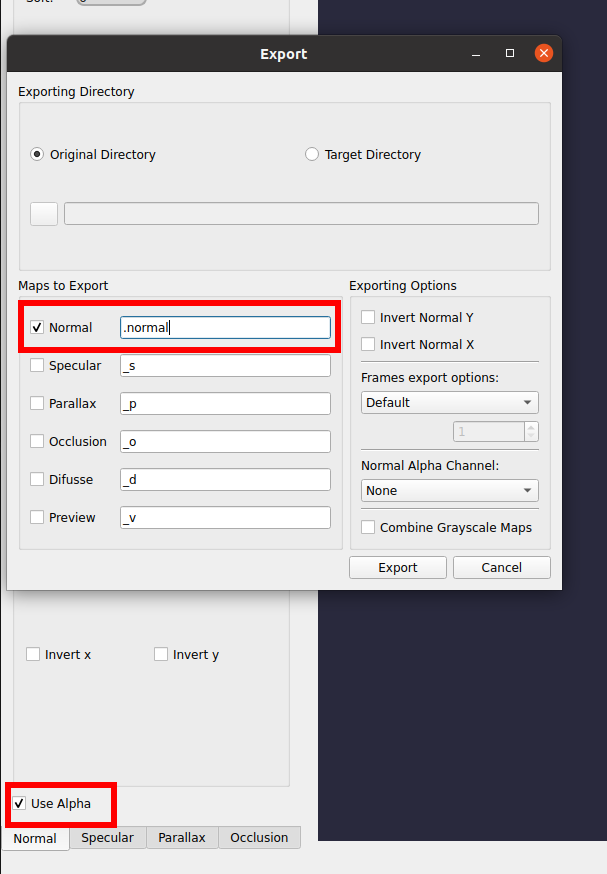
Configuration: Ensure you enable
use alphaand disable theinvert xandinvert yoptions in Laigter for best results.